
45 DIY Wall Art Ideas That Will Take Any Blank Wall To New Heights
If you’re en route to designing your perfect home, you need a brain full of creative ideas that can help you come up with a clear and concise plan to make your home beautiful; not to mention that all your ideas should be easy enough to bring to life which is what most homeowners struggle with most of the time. Pairing the right color with the right furniture and decorations can be rather complicated if you’re not one of the professionals. Well, you can thank your lucky stars because we’re here to bring you some brilliant wall art ideas that are not only a simple DIY project but unique pieces of art that are absolutely eye-catching. Wall art can be a simple, elegant, yet minimalistic decoration piece that can spice up your home in an instant.
Rug-Wall Tapestry
Some rugs look really pretty and would be such a waste to just leave on the floor. On the other hand, you might have cute rugs that you don’t use but don’t want to get rid of. How about putting the rugs you have to good use?
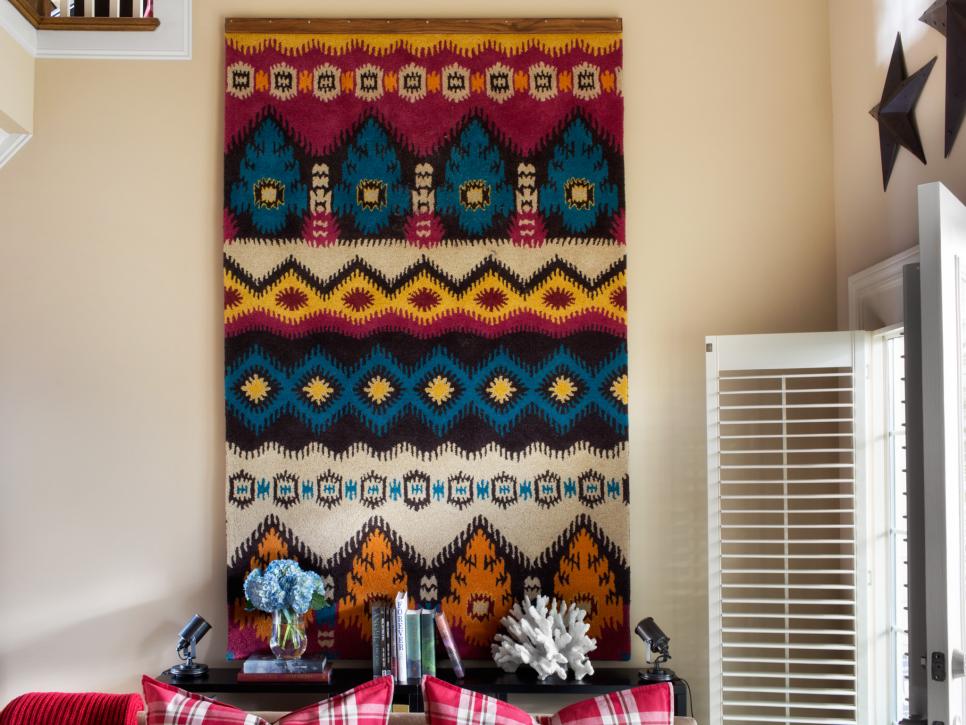
Try turning unused rugs into a wall tapestry! All you need to do is hang the rug on your wall, and you will do your rug justice by putting it on display for all who visit your home to see.
Framed Scarfs
Other than rugs, scarves are one staple fashion piece that almost everyone has. However, we only have one neck, and most of the time, 80% of the scarfs we’ve bought are just sitting in the back of our closet, collecting dust.
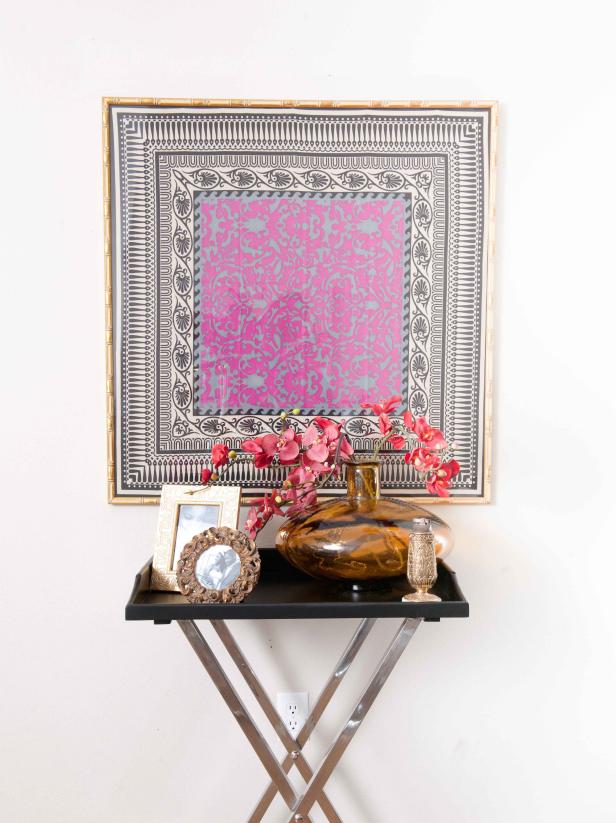
Therefore, one solution is to frame the scarfs in sophisticated frames to transform them into stunning wall decorations. Keep in mind to choose frames that match your scarf’s style; for example, for a vintage scarf, choose a frame with a retro vibe.
Cork World Map
Next up, an excellent idea for all the homeowners who are travel lovers is to create a cork world map where you can mark where you’ve been in the past and where you wish to visit in the future.
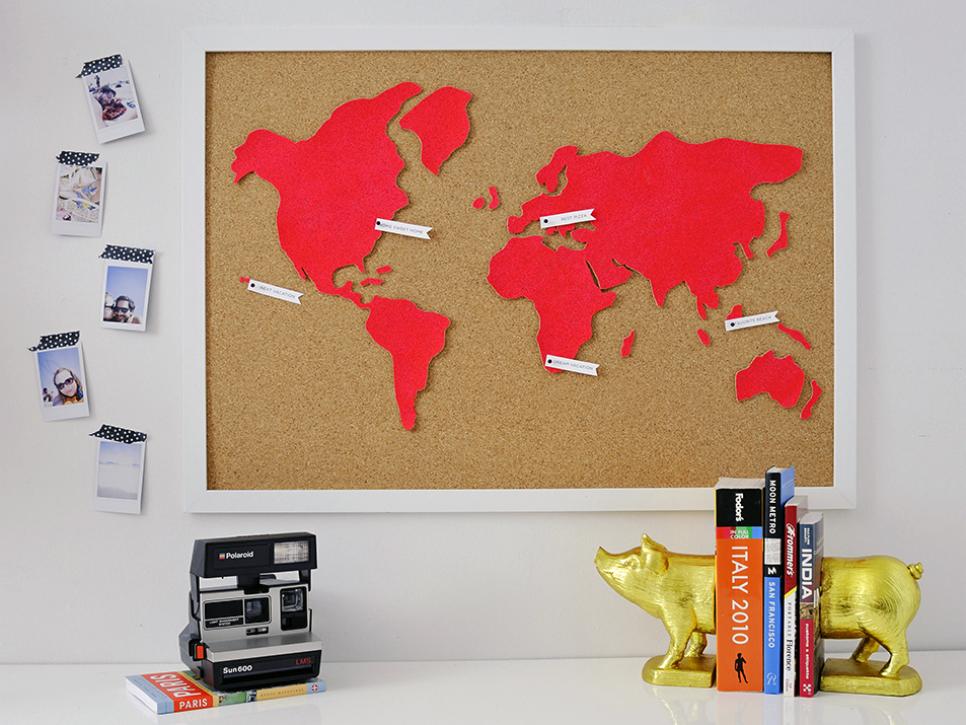
Simply print out map templates, trace them onto colored paper, and cut them out; the map can be of anywhere you’d like it to be. Then, assemble them onto a corkboard. Finally, pin down where you’ve been and where you’d like to go.
Cork Bulldog
Alternatively, use corks and create bulldog-shaped art. This is a charming addition to include in your kid’s room if they are dog lovers. You could pin learning information onto the board; the adorable bulldog would tempt your kids to look at them more.
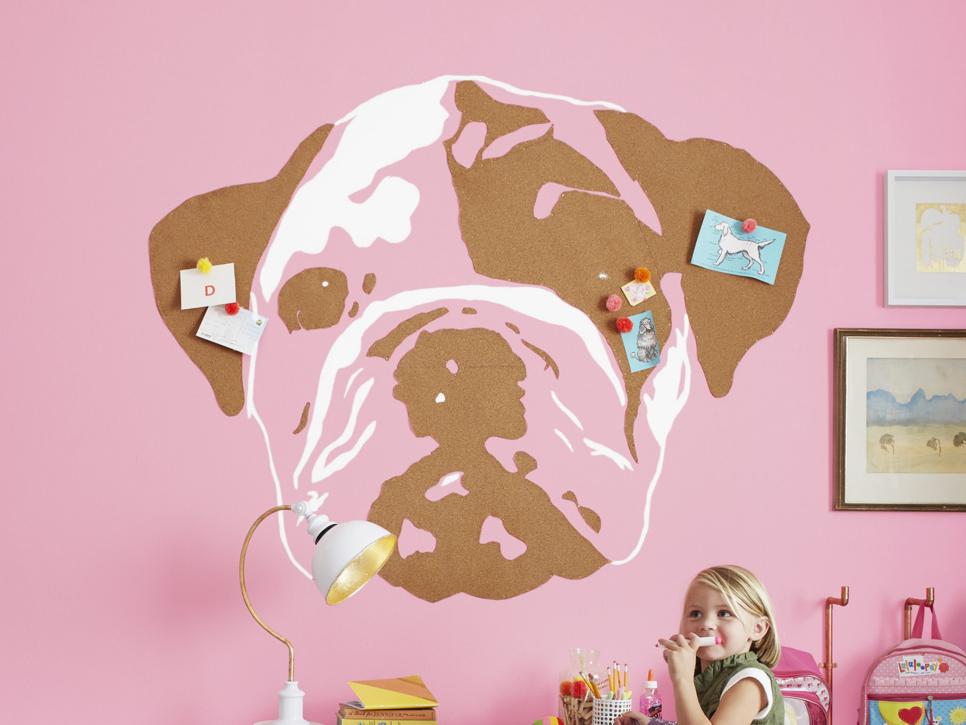
To do this, print a pumpkin-carving stencil of the design onto a transparent sheet. Then, shine the image onto the wall and tack sheets of cork to the wall. Finally, trace the design and cut it out with a knife.
Wine Corks Wall Art
Speaking of cork, wine corks are something that most of us have but don’t know what to do with other than chuck them down our garbage bins. Well, instead of simply throwing them away, here’s one way to put them to good use.
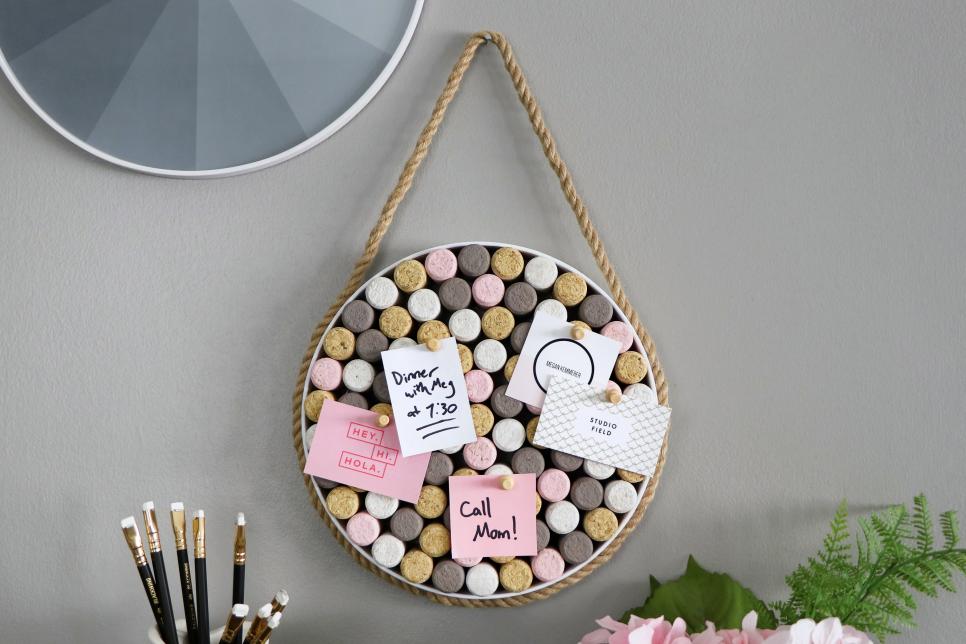
Make a memo board that you can hang on your walls; a functional yet pretty wall decoration! Start by collecting wine corks. When you’ve collected enough, super glue them together to form a circle. Then, attach a piece of twine to the back, and you can begin putting memos on it.
Rustic Artwork
This next idea is for all the artists out there; if there’s someone in the family who’s always creating pieces of art, we’re sure that you’d definitely want to display them around the house, but why spend money on picture frames when you can make one yourself?
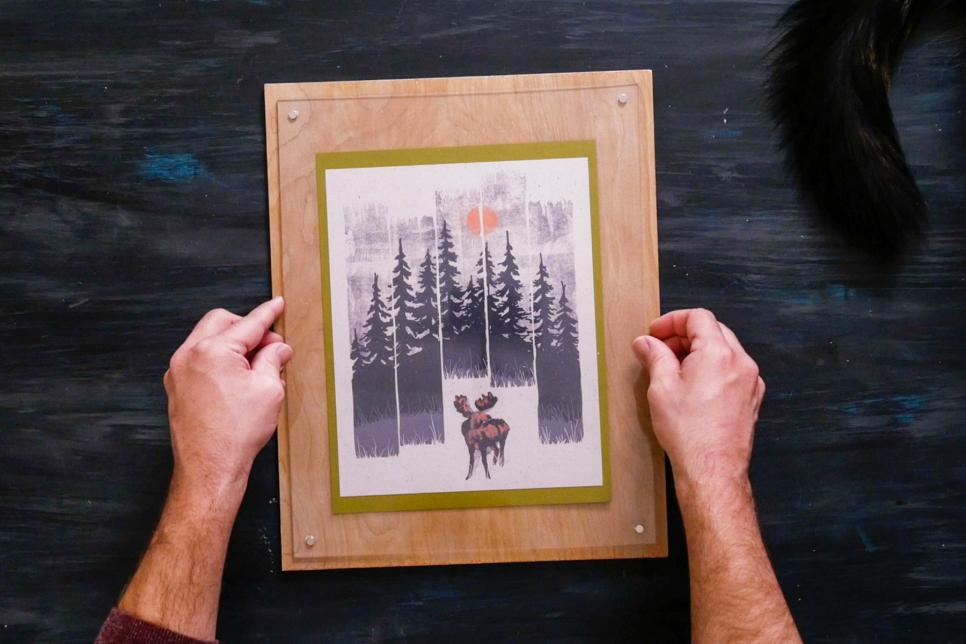
To create this rustic-looking frame, first place the art in the center of the wood. Then, measure ½ inch from the art, drill the wood accordingly, and attach the two together. Finally, sand down the edges, and it’s ready to be hung on your wall.
String Art
Next, you can put your art skills to the test with this monogram string art which is originally from the ‘70s. This piece of art would add vintage vibes to your home like no other art would; you will not regret trying this!
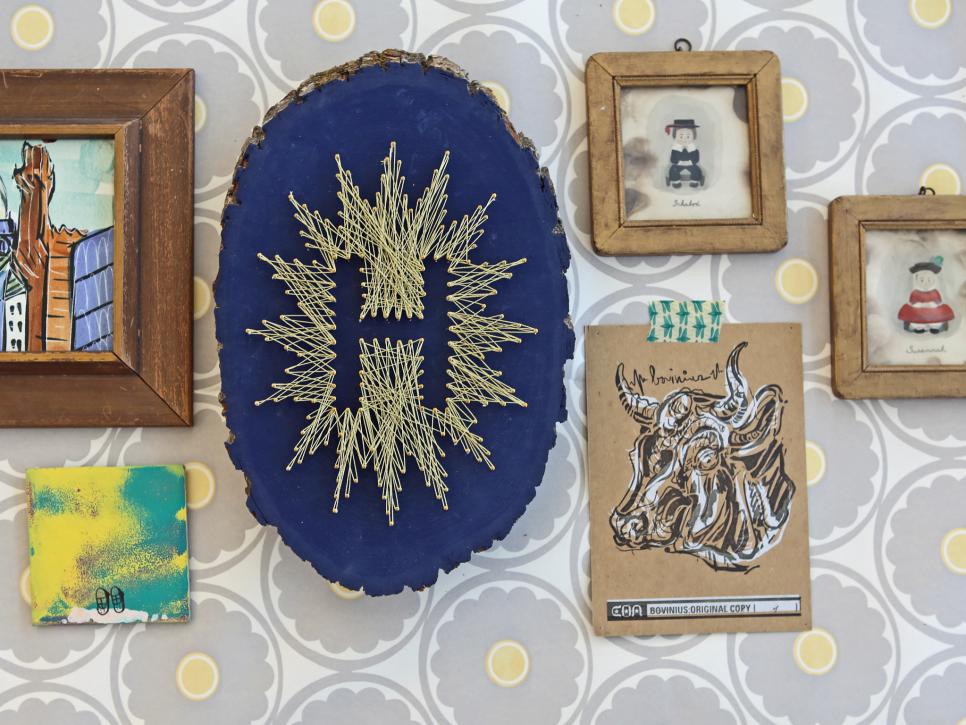
First, paint the surface of a plaque and print out a starburst monogram template. Then, center the template onto the plaque and add nails about ½ inch apart around the outer edges of the template. Finally, remove the template and wrap strings around the nails.
Embroidery Wreath
Another piece of wall art that requires string is an embroidery wreath. These are rather popular nowadays and can easily be bought from stores that sell handcrafted goods. Alternatively, you could try to make this a very fun DIY project!
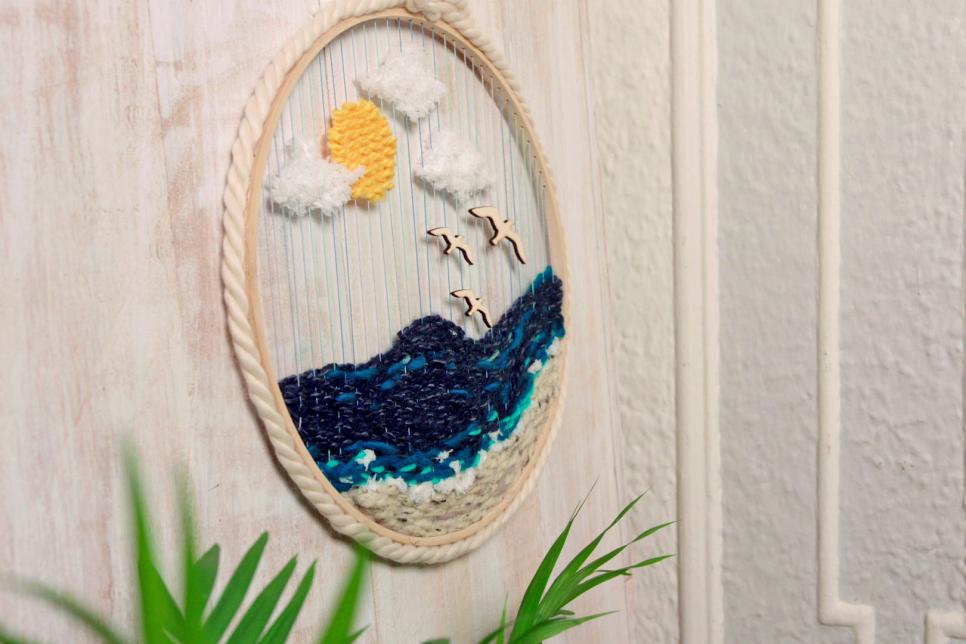
Take inspiration from the picture above that transforms a simple embroidery hoop into a seaside loom wreath. Handcrafted goods are always pretty to look at and add a bit of a personal touch, especially if you spent some time and effort making it yourself.
Nail Wording Artwork
Calligraphy is visual art that is designed and executed by lettering with writing instruments; it is a beautiful work of art if done well. So, challenge your calligraphy skills as well as your carpentry skills and incorporate calligraphy into your wall art collection.
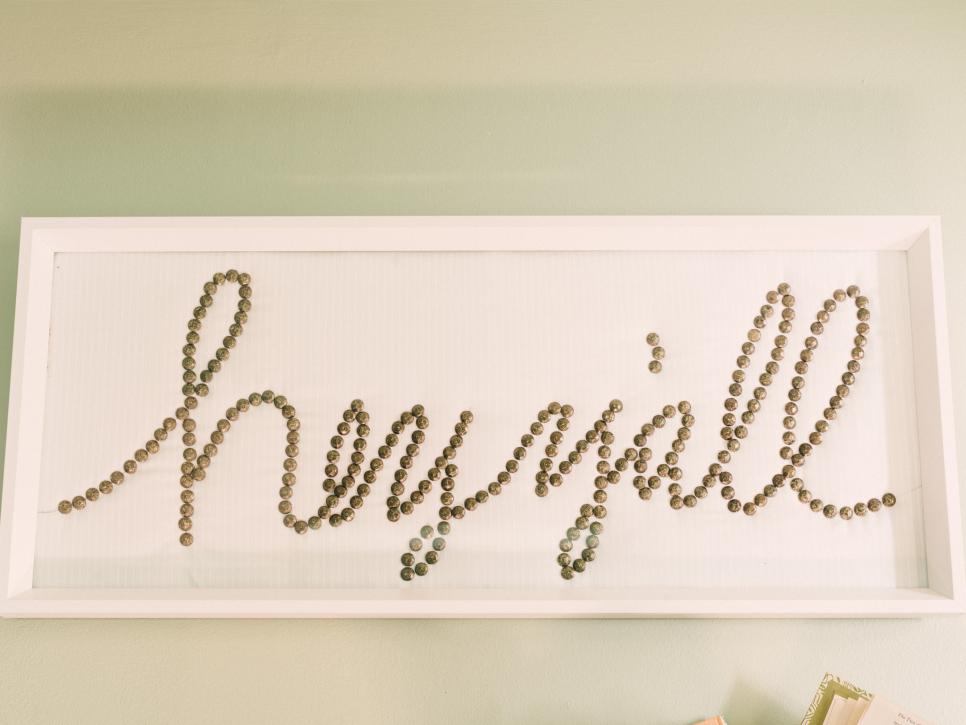
First, decide on the phrase and pencil it down onto a foam core. Then, apply nail heads with a hammer along with the penciled words; be extra careful with this. Finally, place the foam core in a complimentary frame and hang it on your wall.
Yarn and Wire Wording Artwork
For those whose carpentry skills are slightly lacking, opt to make a calligraphy art piece with yarn and wire. This is a more accessible version of the wall art idea mentioned above that almost anyone can try. All you need is yarn, wire, a wooden plaque, glue, and some twine.
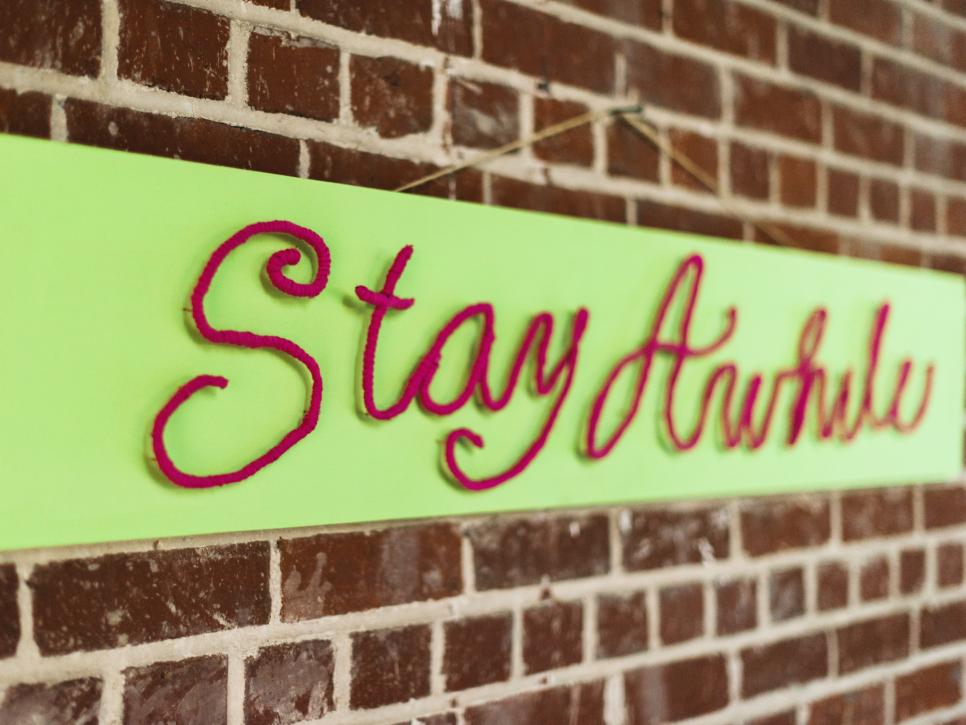
Firstly, pencil down the phrase you’ve chosen onto the wooden plaque. Then, with glue, trace the penciled trail with yarn and wire and secure it in place on the plaque. Finally, attach a piece of twine behind the plaque for it to hang on the wall.
Cardboard Planters
Another wall art décor idea that challenges your carpentry skills is a DIY geometric cardboard wall planter. It’s also a great addition to the homes of those who are outdoorsy, but if you don’t dig this idea, check out the next one for a plant wall décor alternative.
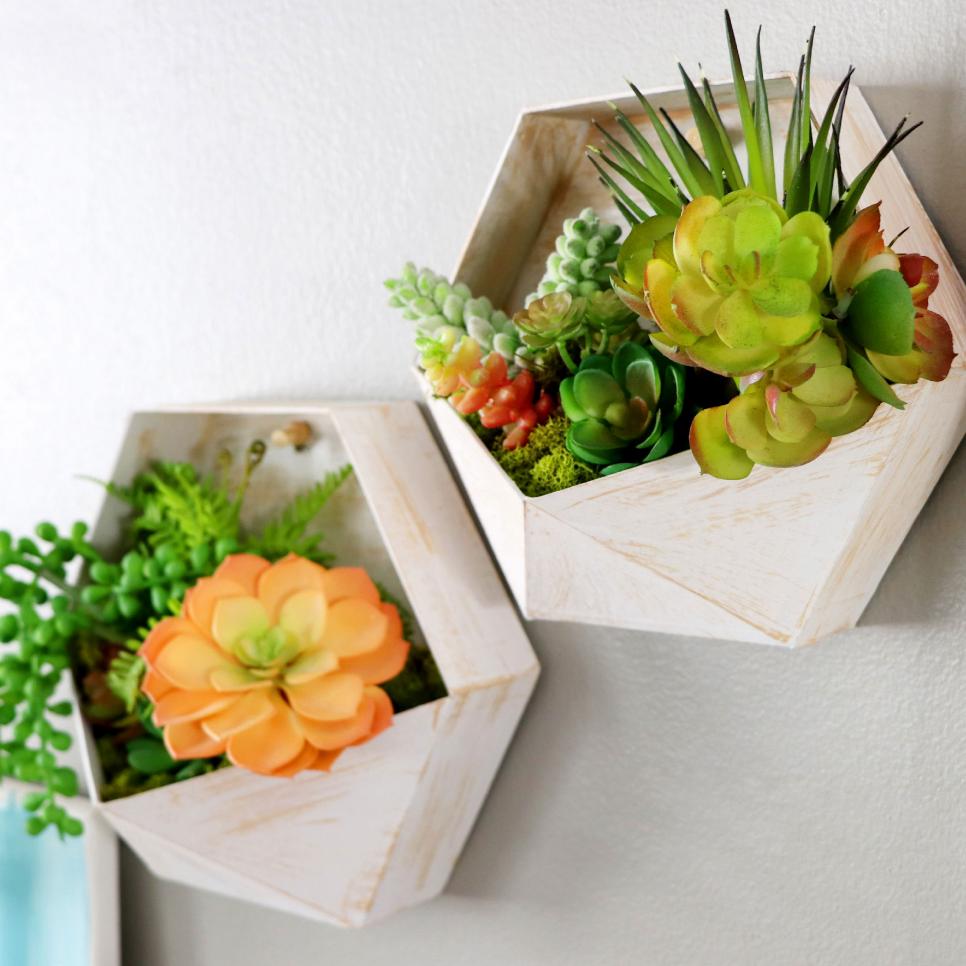
All you need to do is find a printable pattern online and trace it onto a piece of cardboard. Then, following the instructions, cut and construct the cardboard planter. Last but not least, add a small plant to it, and you’re done.
Cookie Tin Planters
Alternatively, you can substitute cardboard with cookie tins which we’re sure most of you have from the cookies you’ve eaten. Cookie tin planters work just as well as cardboard planters, even better, some might say, because of how sturdy cookie tins are.
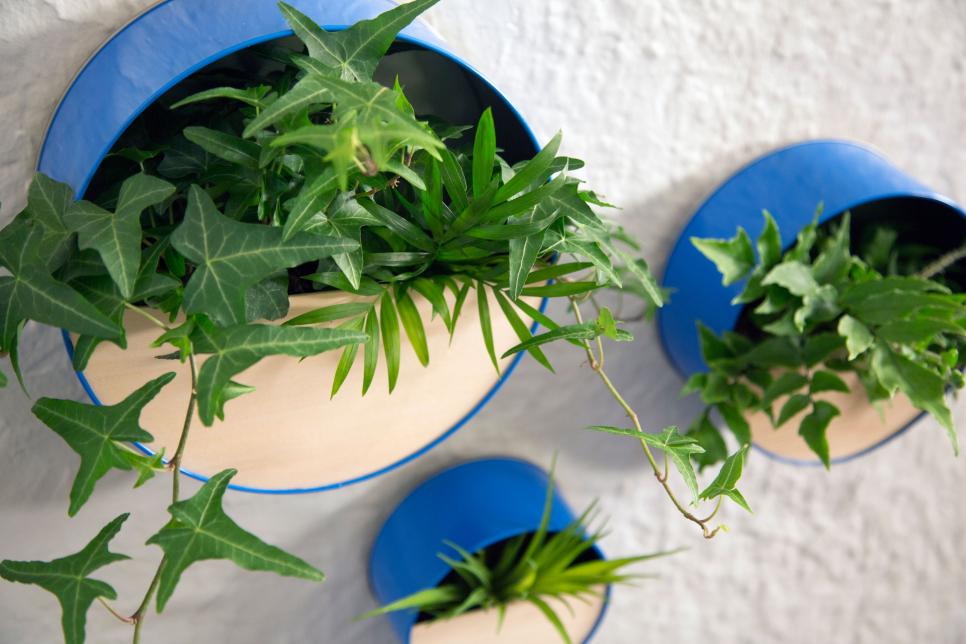
Start by measuring a thin piece of wood to the diameter of the cookie tin. Cut the wood so that it covers half the cookie tin. Then, shape the wood into a semi-circle that would fit in the tin and secure it in place with super glue. Finally, tape a piece of twin to the back of the tin and place plants in it.
Hanging Vases
Other than cardboard and cookie tin planters, you could try making hanging vases to hold tiny plants by reusing baby food jars. This is a great way to decorate your walls in an environment-friendly way. It’s also a fun project to do!
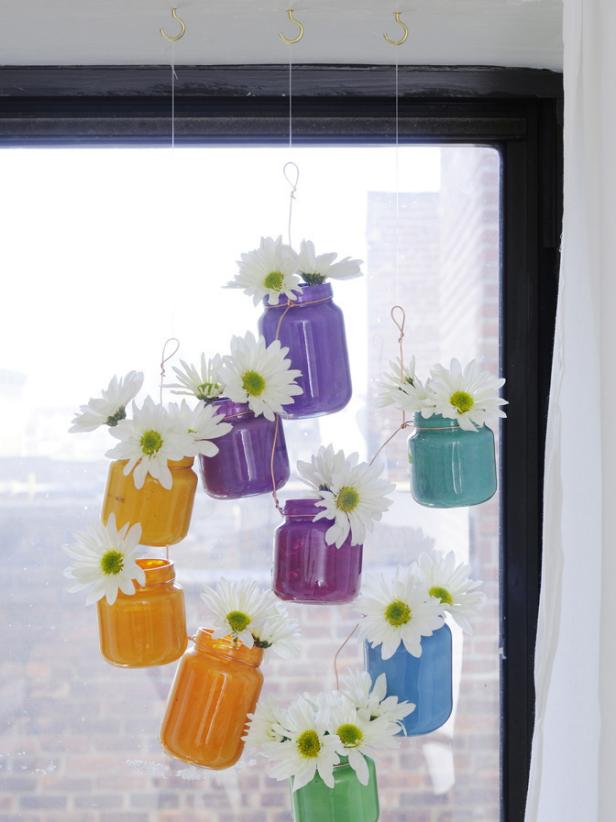
For this project, you’ll need to collect a few baby food jars. Once you’ve collected enough, you can spray paint the jars for a pop of color. Then, string them together and add fake or fresh flowers to the jars.
Faux Boxwood
For homeowners who are big outdoors fans, it is most likely the case that your go-to home decoration would be houseplants. However, houseplants are not something you can hang on your walls, so this must be a bummer for some of you.
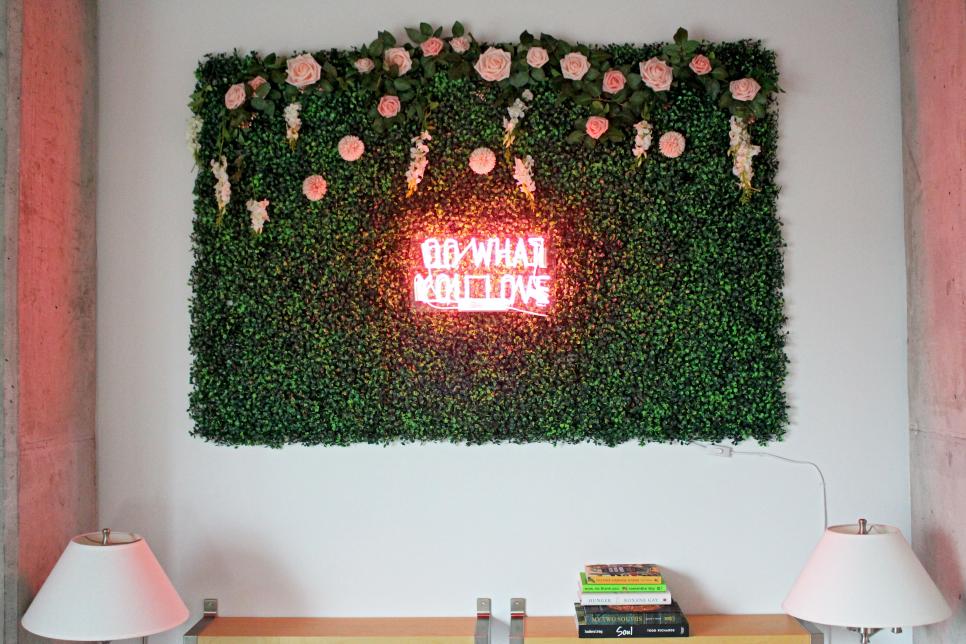
Not to worry because here’s an idea for a “plant” wall decoration, and that is creating a faux boxwood art of your own. Simply construct the panel by connecting artificial boxwood panels together and adding faux florals and a neon sign for a pop of color.
Branch Taxidermy
Additionally, you could try making an organic branch taxidermy that uses all-natural materials; this is definitely the best DIY wall décor for nature lovers! This wall décor idea adds a touch of nature to your home and fits well in a home with a minimalistic theme.

Pick out a wooden plaque of your desired wall décor size and some grafting moss. Now, go outside and search for some branches. Then, attach the branches to the grafting moss that is attached to the wooden plaque. Finally, hang the décor piece on your wall.
Coffee Filter Artwork
For a low-cost wall art alternative, look around your home and find some coffee filters. This will be an easy task for all you coffee lovers out there. But if you’re not, you can still easily buy them in any store at a low price.
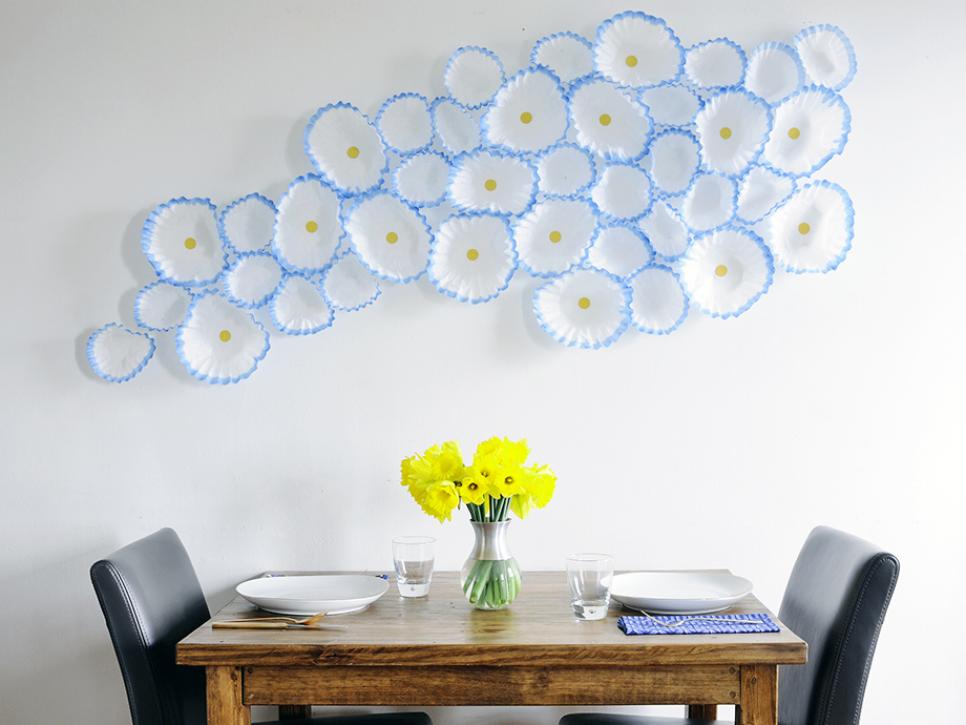
Start by dip-dying the edges of the coffee filters in paint; it’s best to choose bright and vibrant colors as the coffee filters are going to resemble flowers. After that, align the dip-dyed coffee filters on the bare wall in a flowing, floral pattern.
Pop Art
On the other hand, if you think the ideas mentioned above are too complex, try creating pop art that gives your home a modern vibe. Pop art is normally brightly colored, so this is a great way to add pops of color to your home if it’s too monotoned.
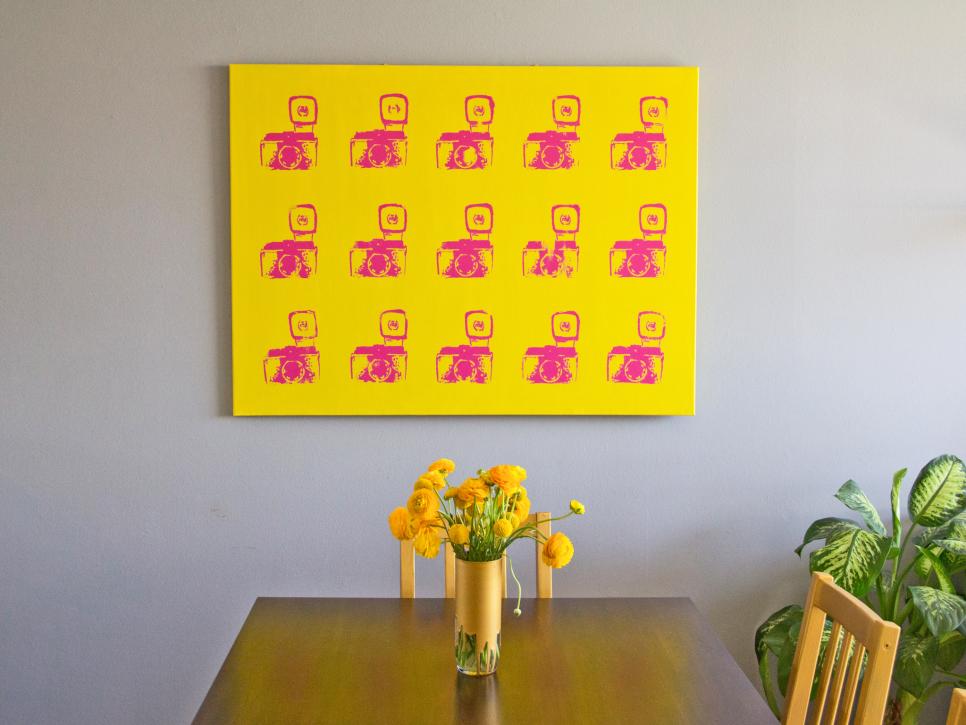
All you need to do is print, cut, trace, and paint a design of your choice onto a colored canvas. Be sure to measure and plan out a grid on the canvas before actually painting the designs to ensure that there are no mistakes.
Spray Bottle Artwork
Furthermore, you could try making drip art which is a common project for kids to do in art classes in grade school. Similar to pop art, drip art, or more commonly known as spray bottle art, can be extremely colorful.
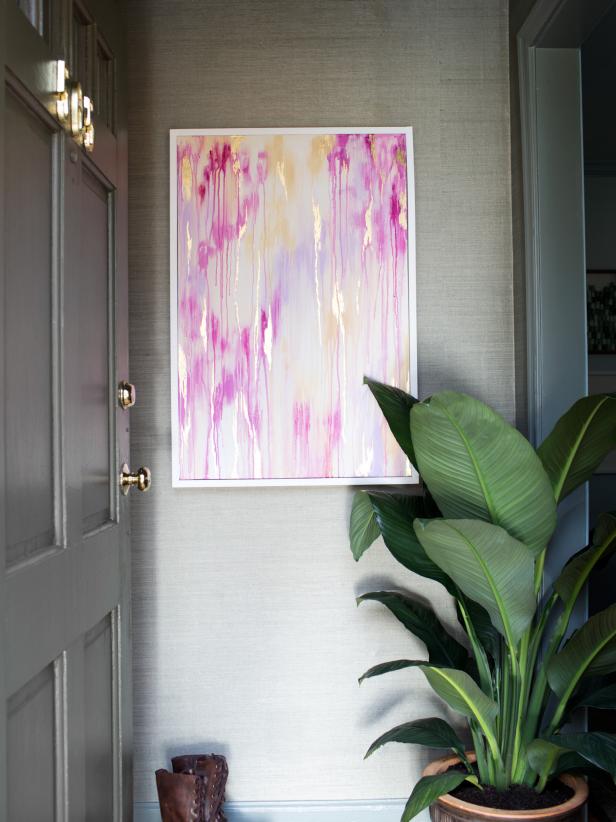
One way to make drip art is to drip latex or acrylic paint randomly across the top of the canvas. Conversely, directly apply paint to a canvas and spray it down with a bottle of water; the water dilutes the pigment, which causes it to drip.
Ombre Artwork
Moreover, you could try painting a canvas in ombre colors. This is another easy DIY project that you can hang on your wall. As a bonus, it has the ability to add a pop of color to your monotonous room.
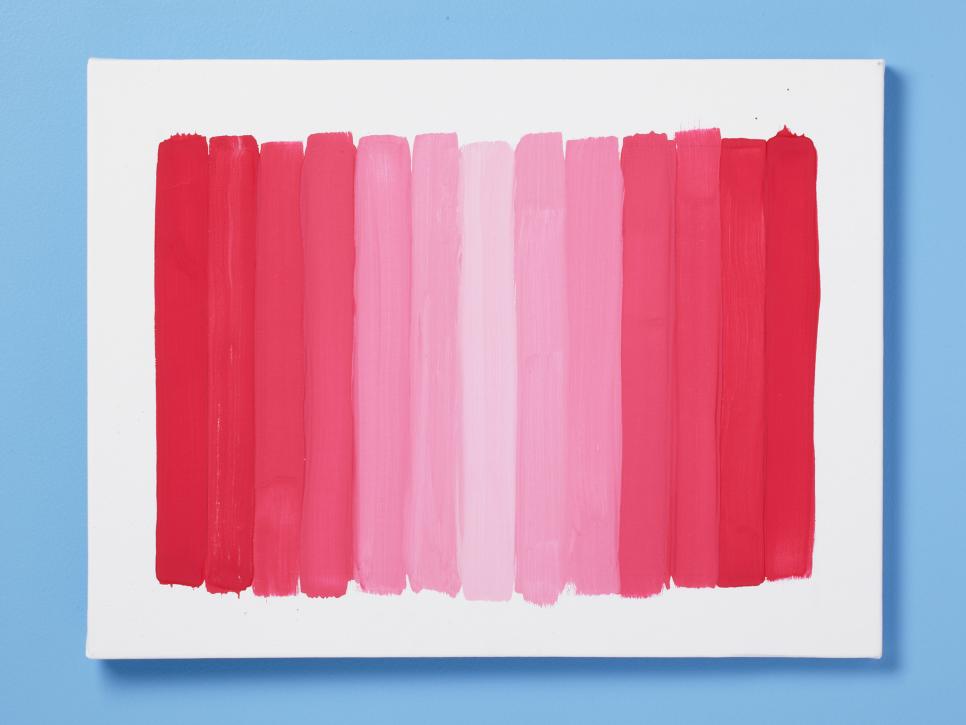
Ombre colors are the blending of one color hue to another; technically, it is the same color but in different shades. So, to create ombre artwork, prepare different shades of a particular color. Then, start painting outwards in stripes from the lightest to darkest shade.
Geometric Paintings
Additionally, geometric paintings are rather popular nowadays as they easily add a modernistic feel to your home. As a bonus, it is simple to create and fills up your walls quickly as huge paintings cover a significant portion of the walls. However, it does challenge your artistic skills, but the process is great fun.
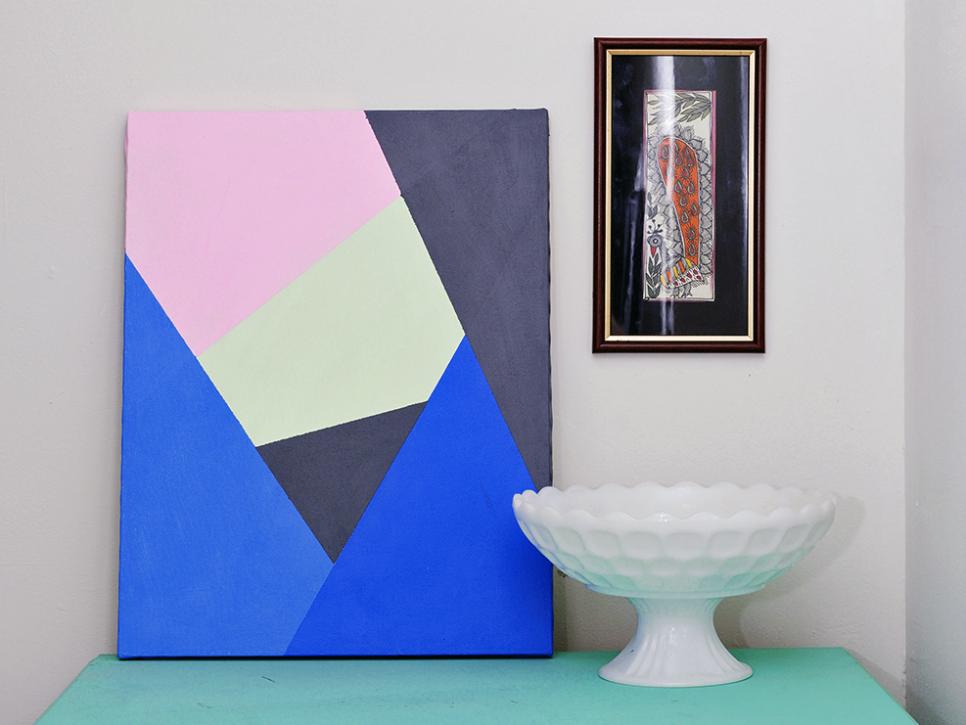
With painter’s tape, block off one corner of the canvas and paint that section with one color. When the paint is completely dry, remove the tape. Then, section off another corner and paint with a different color. Again, remove the tape when the paint has dried. Repeat the steps until you’ve painted the whole canvas.
Layered Paintings
Moreover, textured paintings are paintings that have visible brush strokes in the completed artwork; the brush strokes add texture and depth to the painting, which makes it come alive. These kinds of paintings are a great addition if you want your home to look extra artistic.

While textured paintings can be bought, art stores also offer supplies that can add texture and depth to a painting. But did you know that you can create textured paintings by layering paint? Simply apply thick layers of paint to a canvas randomly with a painting knife.
Portraits Artwork
The easiest wall decoration would be hanging picture frames; however, we want to take this to the next level and create an unconventional picture wall art. This can be done by hanging oversized pictures on a blank wall; we promise the end result will look stunning.
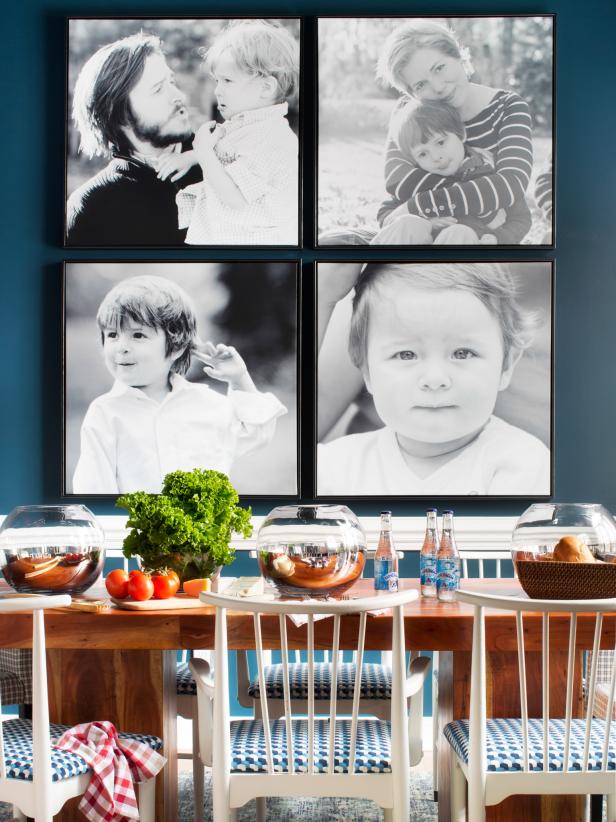
On your computer, try making a collage of all the photos you want to hang and determine whether the arrangement would work. When you’re satisfied with the arrangement, print the photos out in the largest size, put them in the picture frames, and hang them on your wall.
Photo Murals
Alternatively, use photo murals that give off the same effect but are easier to install and can be removed anytime. This is great for those who rent apartments or homes as installing this wall décor doesn’t require any drilling, hammering, or painting.
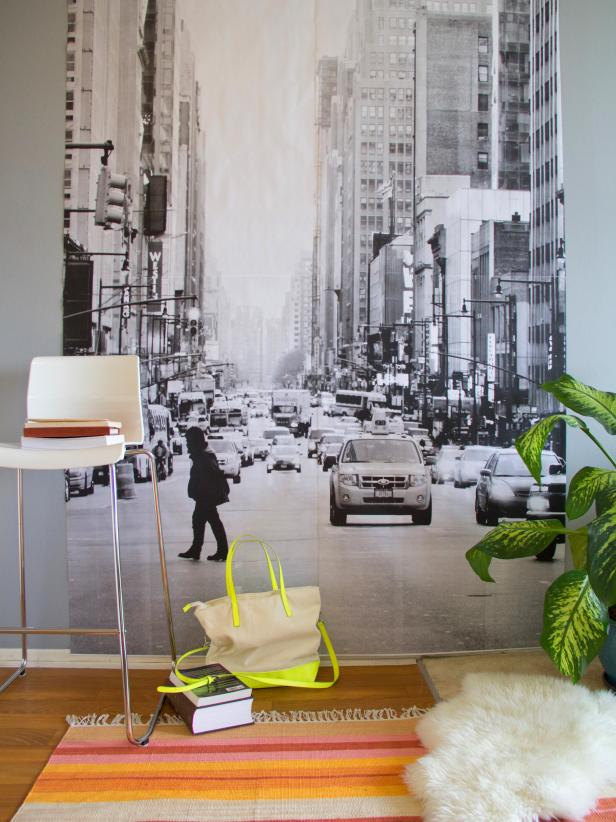
Photo murals are usually printable and personalized; it makes a bold statement about you as you can choose to display photos that have touched you the most or, on the other hand, a photo that has a special meaning to you.
Framed Map Artwork
Similar to the idea above, you could print sections of the world map and frame them to create a wall art piece of maps. This is a great way to showcase your love for traveling and fill up those blank walls.

For this, you can print out the world map or a map of your country. Either way, you’d have to crop out sections of the map in order to fit them in the picture frames. Again, try to make a collage of how you want the final outcome to look to prevent mistakes.
Melted Crayon Wall Art
Another easy-to-make and straightforward wall art piece that decorates your walls beautifully is melted crayon wall art. Not only is this project suitable for adults, but it’s also an enjoyable project for kids too! So, turn this into a bonding activity with them.
Start by choosing crayons with complementing colors. Next, shave the chosen crayons on a piece of wax paper. Then, fold the wax paper over the crayon shavings and melt them with an iron. Finally, cut out the wax paper with the melted crayons, arrange them in a frame and attach the frame to your walls.
Origami Wall Garlands
Speaking of kid-friendly activities, try making an origami wall garland that instantly dresses up your ordinary, bland, and boring walls. This activity requires a lot of patience as small careless mistakes would ruin the whole thing, and you’ll have to start all over again.
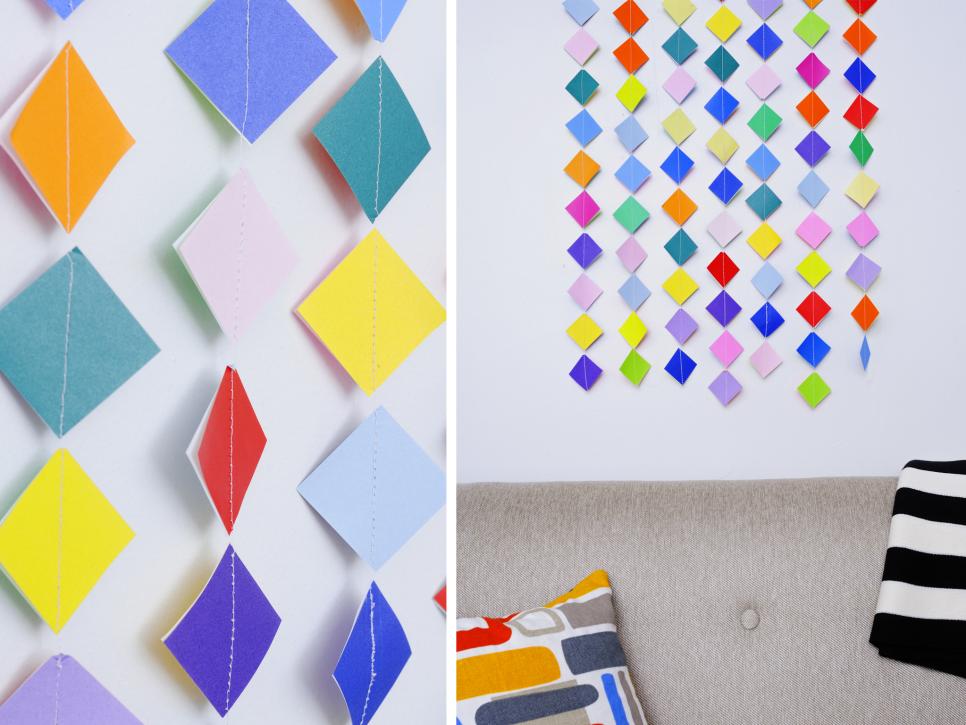
If you’re up for the challenge, pick out an origami design and search for the instructions. Go ahead and follow the instructions and make a couple of the chosen origamis. Finally, sew the origamis together with strings, and you’ll have created a beautiful garland.
Butterfly Wall Art
Butterflies signify grace and delicacy, so they would be the perfect decoration for your room to make it look sweet and homey. Having said that, here’s an easy DIY project for you to incorporate butterfly elements into your home decorations.
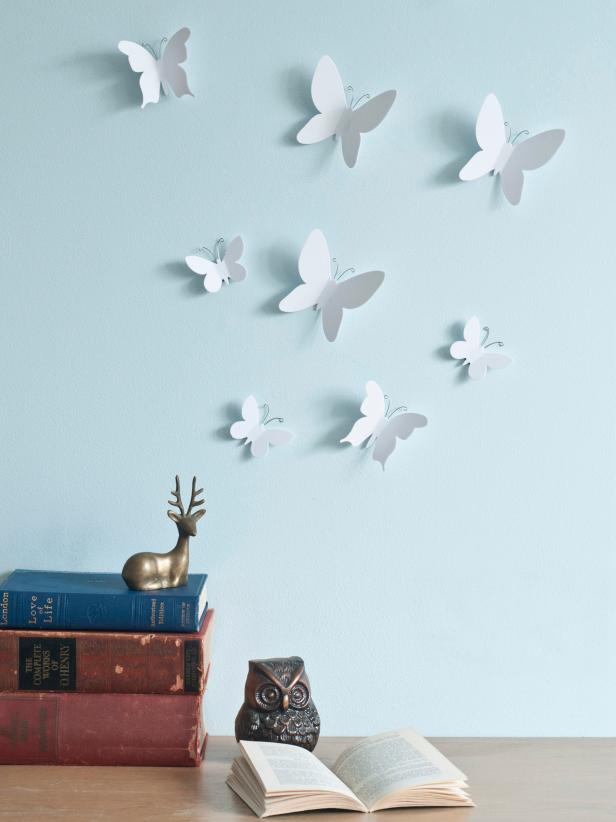
Here’s how you can make butterfly wall decorations with only cardstock paper, scissors, and some blue tack. With the cardstock paper, cut out butterfly shapes of different sizes. Then, gently fold the wings of all the butterflies you’ve made. Finally, attach them to the wall with blue tack.
Scrabble Wall Art
This next simple wall art idea happens to be something that Scrabble lovers would love, and that’s creating a Scrabble letter wall art design. If you have kids who share a room, it’s a great way to separate the room into two sections.
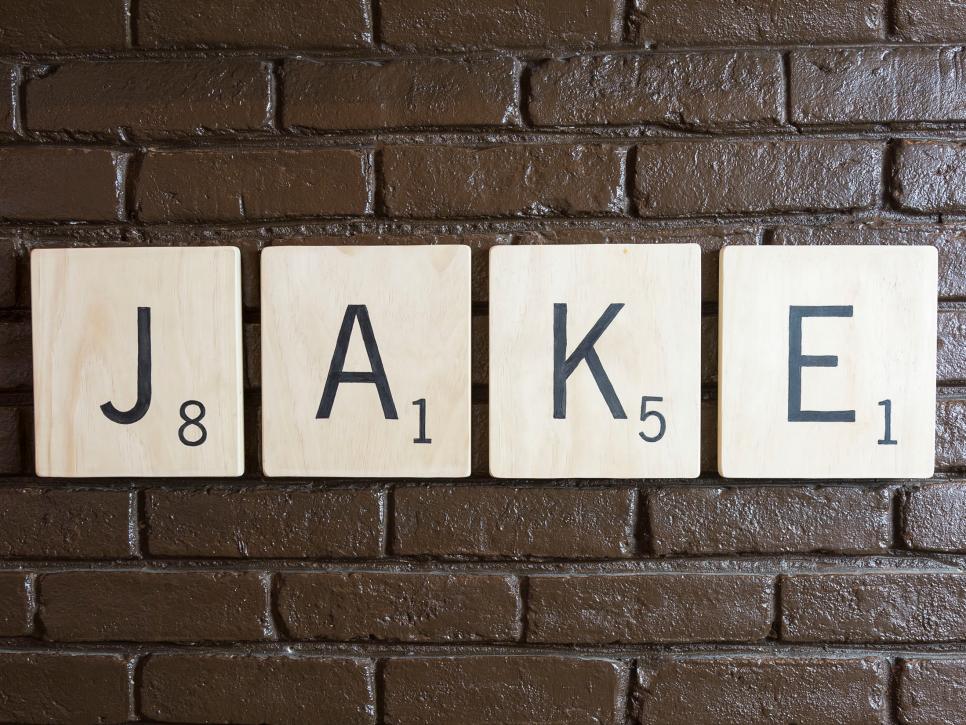
First, decide on a name or word. Then, prepare square wooden plaques and paint the letters of the word you’ve decided on onto the plaques. For them to resemble Scrabble letters, paint on one random number on the bottom-right of each letter.
China Wall Art
Since flea markets and thrift stores are constantly overflowing with discarded china, why not put them to good use by using them to decorate your empty walls? Instead of using plaques to create Scrabble wall art, adapt the same idea to china.
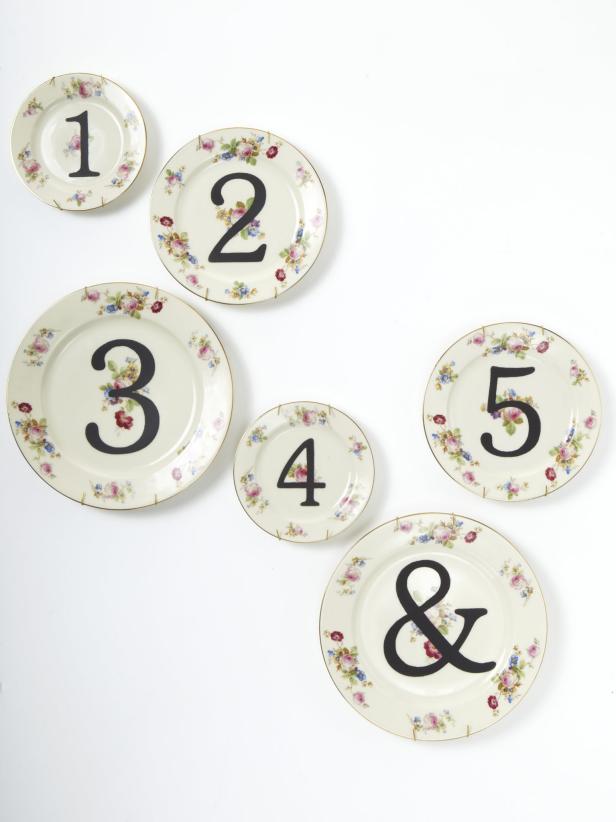
Add custom stencils, numbers, letters, or even hand-drawn art to the china that you have and hang them on your empty walls. This creates an eye-catching, beautiful decoration that costs practically nothing. We’re not sure about you, but this art has definitely captured our hearts!
Woven Basket Wall Art
Instead of using china to create beautiful wall art, try using woven baskets. Woven baskets can often be bought at low prices or taken up as a fun DIY project challenge. Either way, you’ll need a few colorful woven baskets for this next idea.
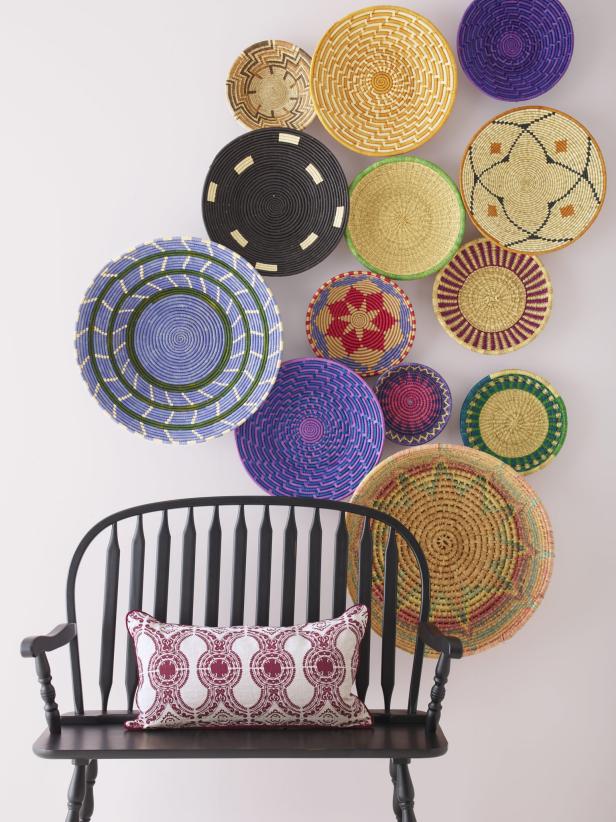
Once you’ve collected some different textured, sized, and colored woven baskets, you can start decorating. For your walls to resemble the picture above, first attach the largest baskets followed by smaller ones; it’s absolutely fine to have the edges of the baskets overlapping one another.
Ceiling Medallions
Alternatively, substitute woven baskets with ceiling medallions for a classier and more elegant finish. Just take a look at how the picture below turned out. You’d think that it is an expensive decoration, but it is actually the opposite.
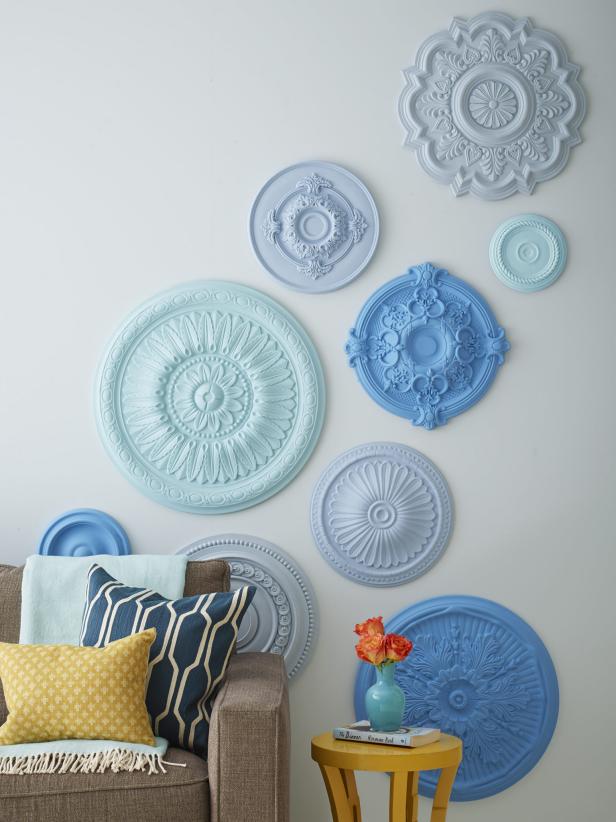
Go ahead and buy a couple of ceiling medallions and paint them in complementing or coordinating colors; keep in mind to wait for the paint to completely dry out before attaching them to your walls with Velcro or strong glue.
Leaves Wall Art
For another no-cost wall art idea, go into your backyard, or if you don’t have one go to the streets outside and pick out a few leaves and foliage that look nice enough. Grab a blank canvas and some spray paint, and let’s jump into this easy DIY wall art idea.

Firstly, lay the leaves you’ve collected down on the canvas. Next, choose any color that you like and start spray painting over the leaves and onto the blank canvas. Proceed to remove the leaves when the paint has dried completely, frame the canvases, and hang them on your walls.
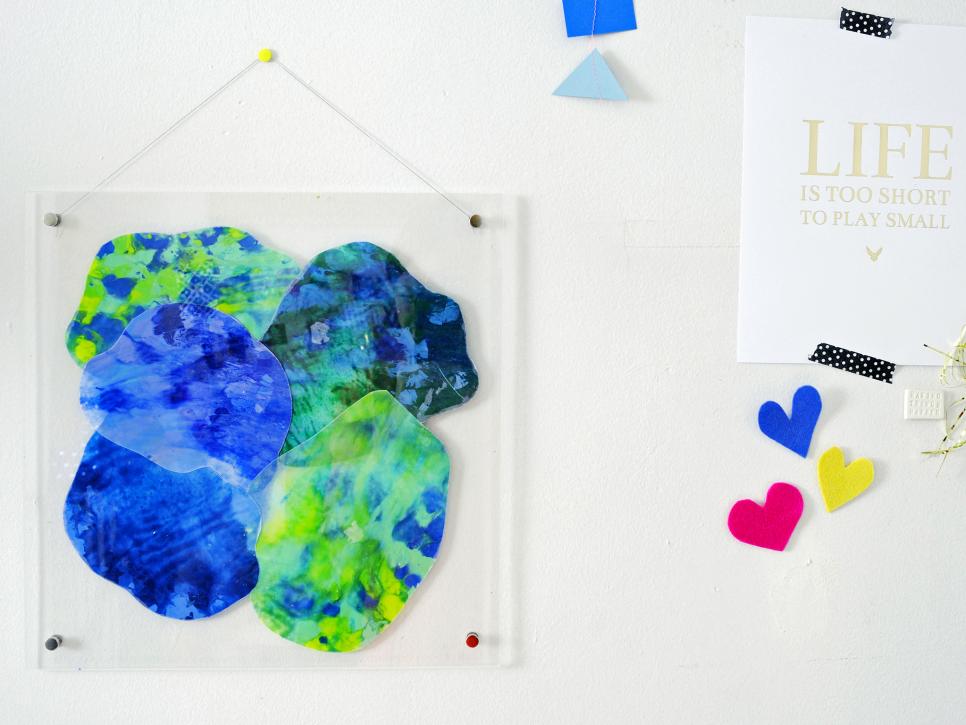
Paint Chip Wall Art – Part 1
Furthermore, paint chips are often given out in the designing process of decorating your home and are often unusable after this. Therefore, you’d have a lot of them leftover, but here’s something you could do with them other than disposing of them.

Transform them into a colorful wall art piece by first arranging the paint chips on a frame; you can cut the paint chips so that they aren’t all the same size. When you’re satisfied with how the frame looks, secure the paint chips with mod podge, and hang them on the wall.
Paint Chip Wall Art – Part 2
Alternatively, create a gradient scale-type wall art piece with paint chips. Start by collecting paint chips of multiple different colors from your home designer. Then, group the paint chips you have by colors and cut them into circles of approximately 3cm diameter.
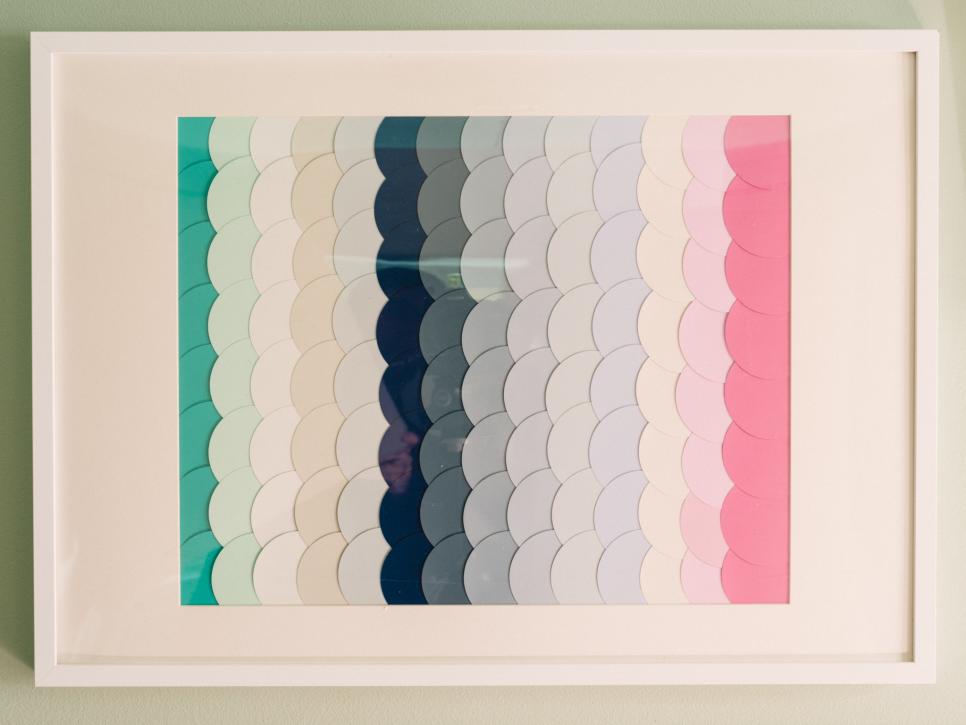
Arrange the colors from darkest to lightest and stack them on one another; use double-sided tape to secure them in place. Once you’re done, you’ll have pretty wall art that is colorful and basically free, which is always something to be happy about!
Washi Tape Art
Washi tapes used to be very popular but has gradually been forgotten or abandoned by many nowadays. If you’re someone who bought lots of washi tapes during the washi tape craze and didn’t want to waste them, here’s an idea to put them to good use.
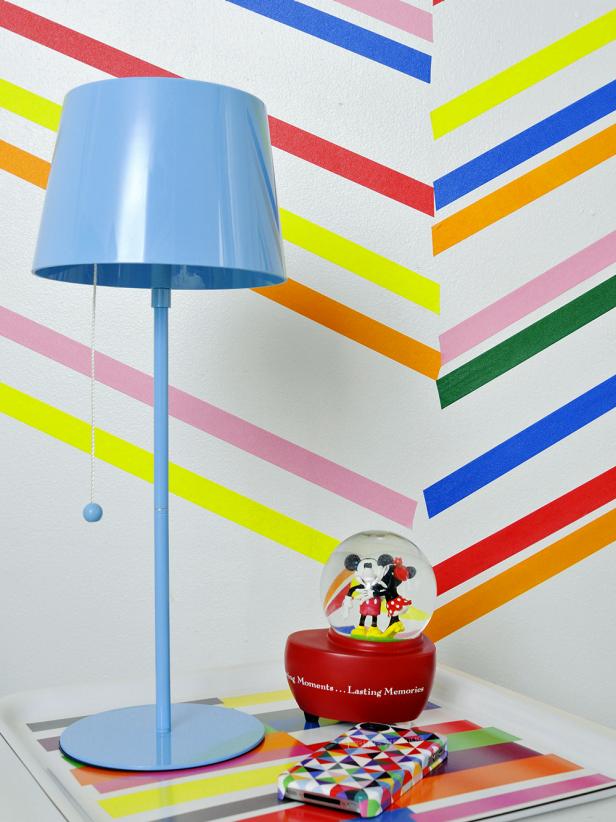
Try decorating your wall with geometric wall patterns created with washi tapes; washi tapes come in different colors and patterns, which is an easy way to spice up your monotoned room. Additionally, you can easily remove the washi tapes when you get bored with the designs.
Instant Photos
Something that is quite trendy nowadays is instant photos. However, the downside to taking instant photos is not having somewhere to display them other than photo albums. Although let’s be honest, the main reason we take instant photos is to display them somewhere that is conspicuous.

Therefore, here’s somewhere conspicuous to display all the beautiful instant photos you’ve taken, and that’s on your walls! Start by grouping photos with the same color schemes and framing them together. Finally, hang the frames of pictures on your walls.
Film Photos Wall
In addition to instant photos, film cameras are also very popular among youngsters nowadays. If you’re one who loves vintage vibes, you should definitely try buying a film camera and taking pictures with it. After taking the photos, go over to a photography shop and have your films developed.
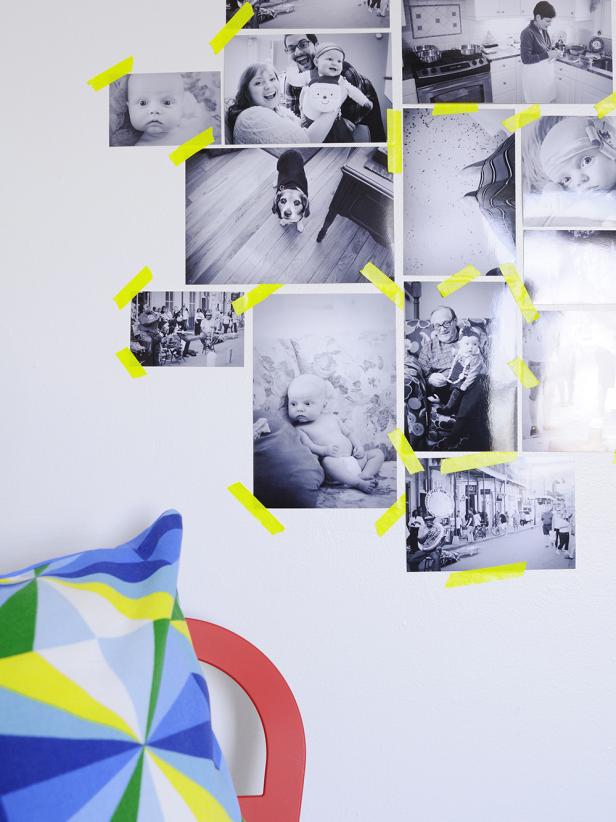
There’s the option of printing the developed films, and you can choose to do this so that you can display your photos on your wall at home. Alternatively, you could print them in black and white too to give off a more timeless and nostalgic feel.
Photo Collages
However, if you don’t own any film cameras but you love the idea above, that’s fine because all you need is pictures. It doesn’t matter if the pictures were taken on a camera or not. All you need to do is to print out your pictures.
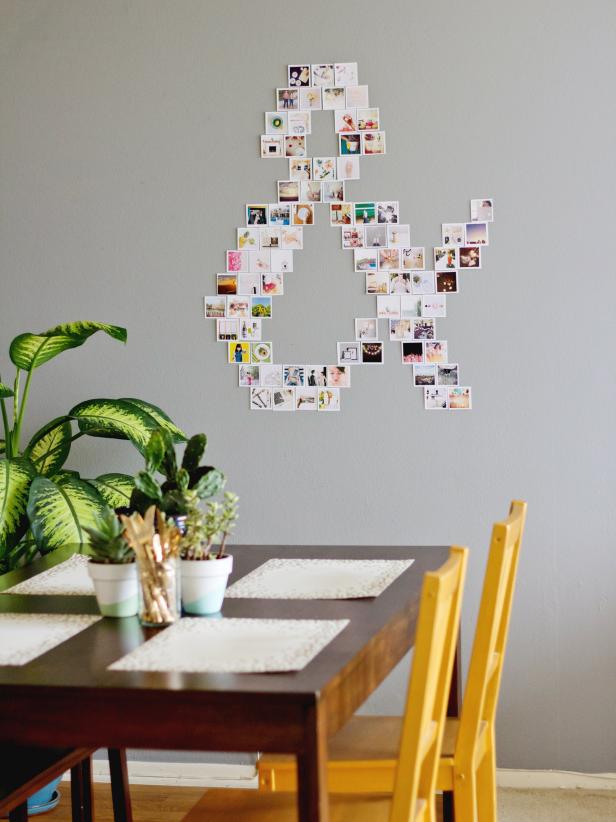
Once you’ve printed them out, you can arrange them on the floor and see how the end product would look. When you’re satisfied with the arrangement, use some blue tacks to stick them on your wall. In the picture above, the pictures were used to make an ampersand.
Gallery Wall
Gallery walls are made out of multiple pieces of smaller art, which are displayed on emptier walls in your home; it’d be a great addition to your wall and fill it up aesthetically. Unfortunately, it is rather tricky to put together an Instagram-worthy gallery wall.
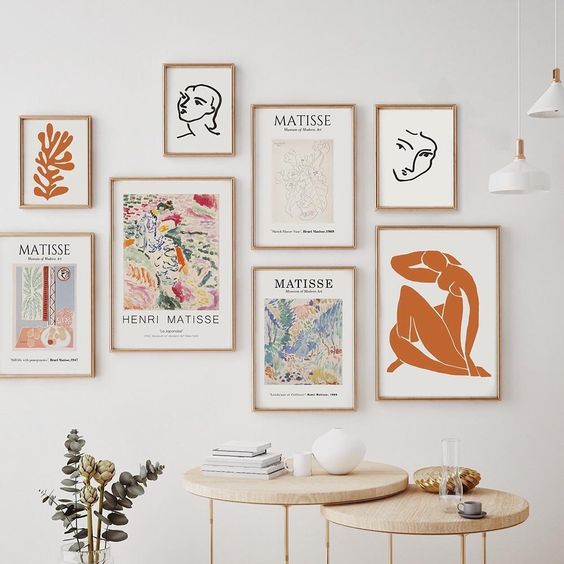
But follow these few steps, and you might just succeed. First, arrange the art you want to hang on your wall on the floor until you find the perfect arrangement. When you find it, attach the art to your wall for the perfect gallery wall.
Open Books
Book lovers must have numerous books in their homes. The conventional way of displaying them is on a typical bookshelf. But don’t you want to try the unconventional way of displaying books as a way of spicing up your plain walls?
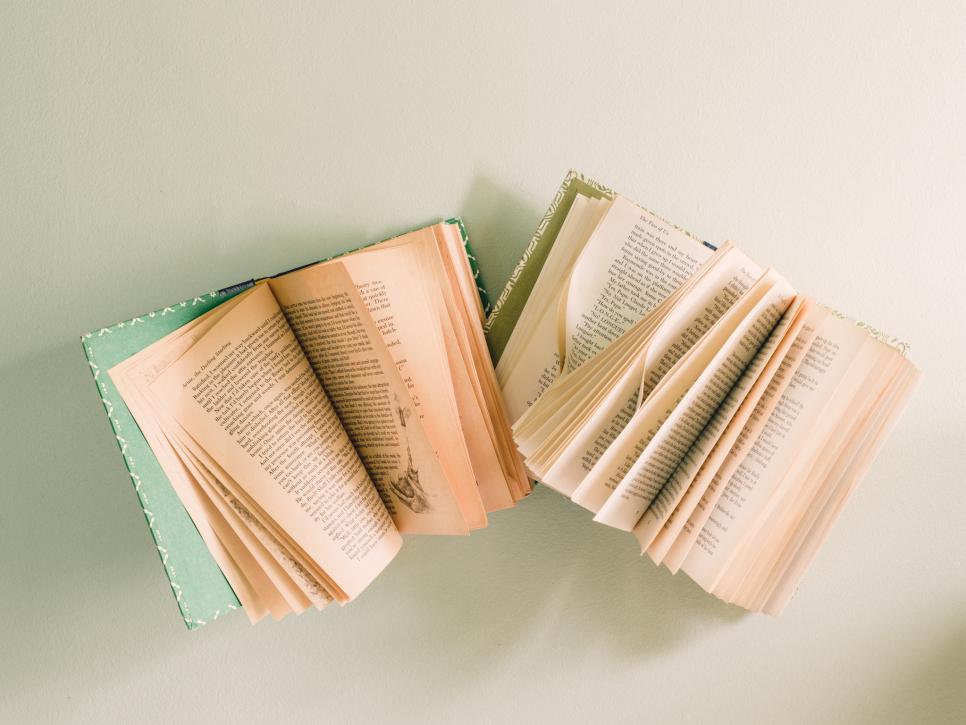
Start by adding hot glue to different areas of back-to-back open pages, which would create the illusion of motion. When the glue has dried, group several books together and attach them to the wall with screws through the back cover of the book.
Crate Bookshelves
As creative as the idea above sounds, some book lovers may find it challenging to do that to their very precious books. So, we bring you a better way of decorating your walls with books without actually hurting them.
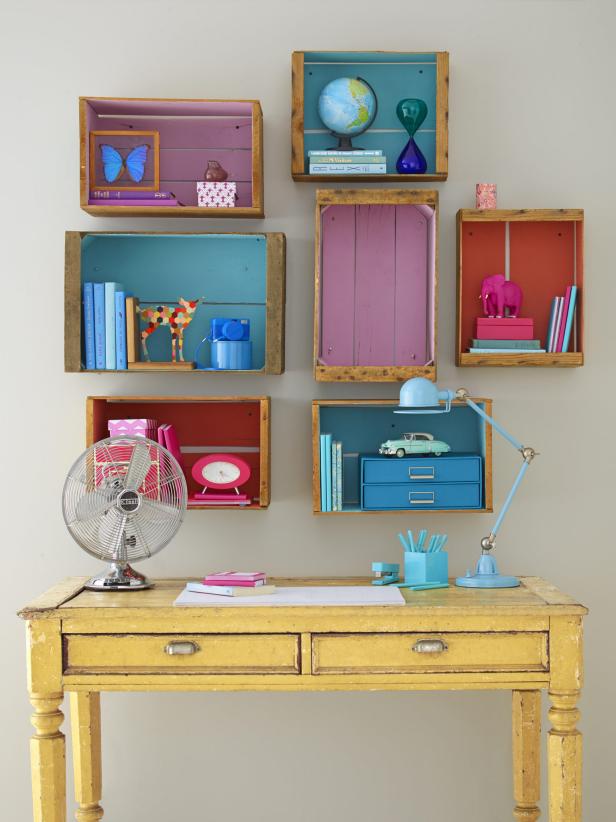
Simple but colorful crate bookshelves can really add color to your room and have it looking bright and vibrant, which can always light up your day. Simply color some wooden crates and attach them to your wall. To finish, place your books inside the crates.
Autograph Wall Art
If you’re someone who loves to host parties in your home, you’re definitely used to lots of guests visiting, which is a big advantage for making this next easy DIY wall decoration; it is a decoration that requires all your guests’ signatures.
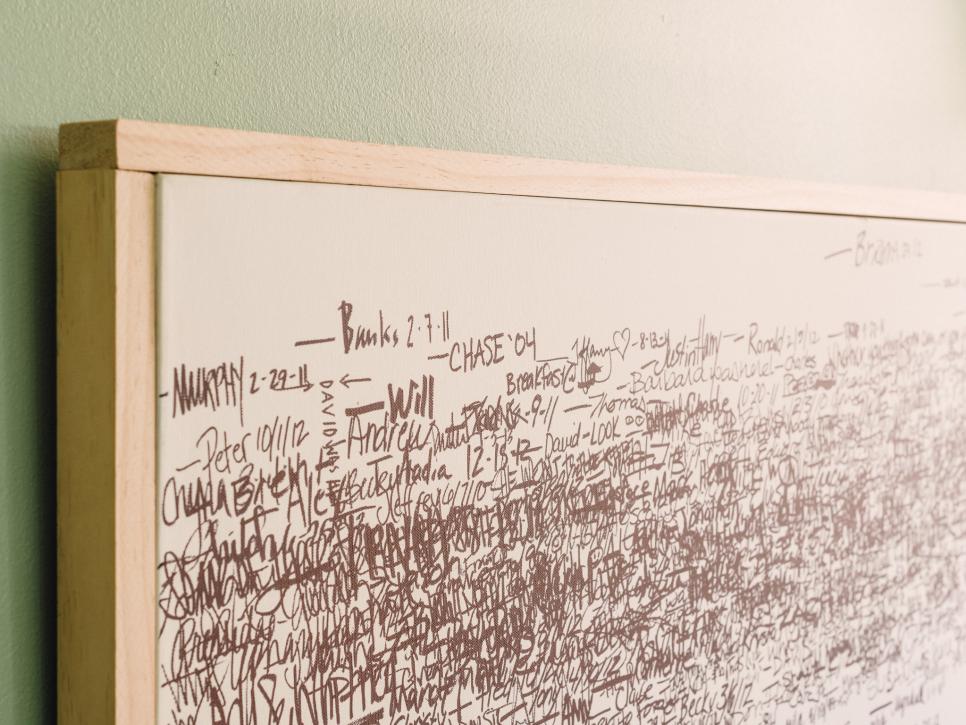
For this project, prepare a big basic art canvas and use nails and screws to add trim around the edges of the canvas to make a frame for it. Then, hang the canvas on your wall. Finally, ask each guest that visits your home to leave a message or autograph on it.
Gold Leafing
One general tip to make any object into a piece of art is to apply gold or silver leaves. Gold and silver are very sophisticated colors that have the ability to elevate any type of simple object you have in your home.
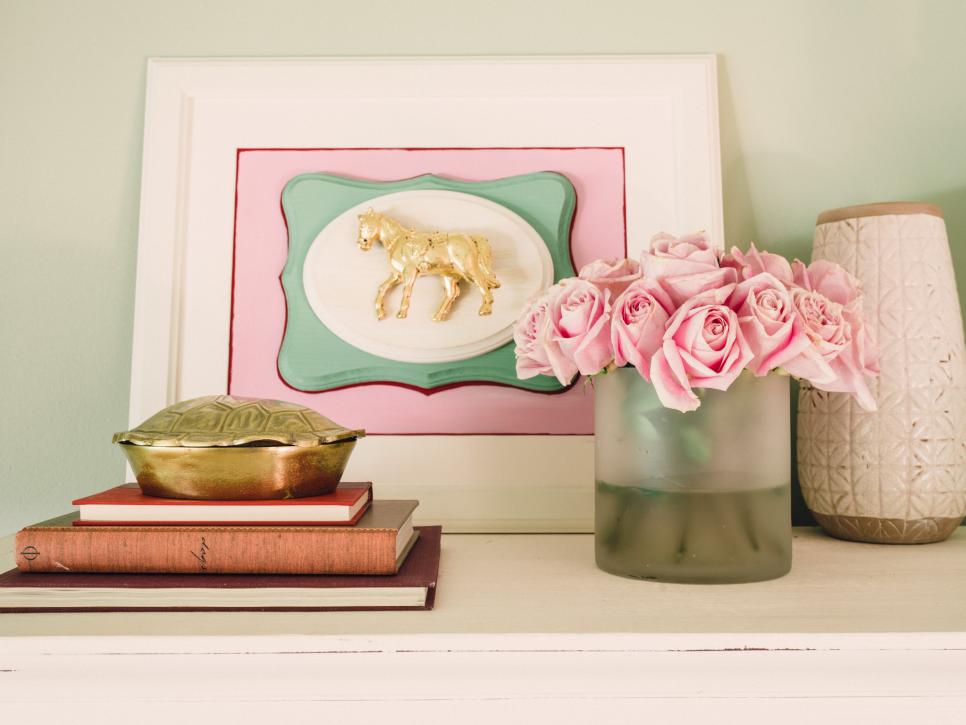
All you need is leafing sheets, leafing adhesive, and a detailed paintbrush. Apply the leafing sheets directly to the object you want to elevate with the paintbrush dipped in adhesive. Then, carefully look for unfilled cracks and use the paintbrush to fill them in.
Touch of Wood
Another general tip to keep in mind is that wood is a great element to add to your room if it is lacking warmth and character. Adding wooden elements to your home can make it slightly cozier without losing the minimalistic feels it has.
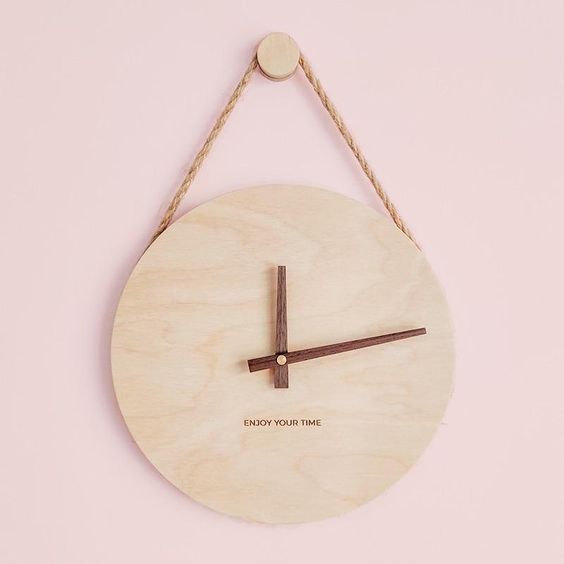
Wooden wall decorations would be a great addition to your home. It’s also an excellent way to cut down costs, as the wood can be recycled. The most uncomplicated wooden wall décor would be a wooden clock which is a useable decoration.
Oversized Shadowbox
Although all the ideas that we’ve mentioned above sound great, and it’s absolutely normal that you’d want to try at least one of them, but you don’t want to end up with a decorated wall that seems cluttered and, in turn, looks a little bit too messy.
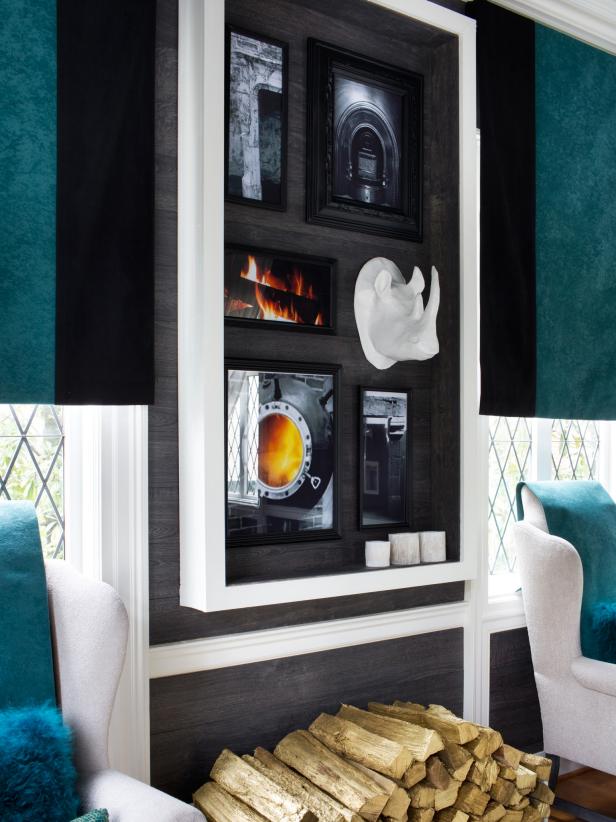
Therefore, an easy solution would be to create an oversized shadowbox to unite a disparate grouping of objects. Shadowboxes allow you to display a range of items inside of them. So, adding some of your wall decorations inside them is a way of displaying them while keeping them neat and clean.